Pages

Monday, February 13, 2012

Valentine Oreo Cookies

Here is my last post for Valentines. I got the idea for these goodies from Danielle Flanders, who is on the design team at Papertrey Ink. I saw hers and thought that it was perfect for Valentine's Day.

I changed mine up a bit to match my style by adding the frilly stuff and doilies. I love using clothes pins, so I thought this would be perfect. I just added some sticky tape and glitter and topped it off with a pearl thingy from Sa Crafters shop.
I put a white fabric flower fan attached with the clothes pin and embellished it with a pink glittered heart and epoxy heart. I thought these turned out so cute!
The only hard part, truly, was dipping the Oreo cookies without having them fall off the stick. Leave it to me to find something out of the ordinary. Please leave a comment if you liked them or have any questions. See you next time!

Valentine Treat Bags

Here is another Valentine's Day project I want to share with you. Boy, I don't post for a few months and all of a sudden a rush. Well, my New Year's resolution is to try to post at least 2 to 3 times a week. (Let's see how that goes!)
These are the Valentines that I made for my daughter's friends at after school care. She is an only child, so these friends are really important to her. Thank goodness God blessed us with these kids as her extended family. They are really a great group of kids.
I used plain white cardstock from PTI and scalloped the edges. I used some digital paper for the center strip and then the red strips is washi tape. I just love that stuff. I wish I used it more. Maybe I will try it a little more in the future.
In the center I used a strip of red burlap layered with some Melissa Frances pink and white crepe garland and then topped with a glittered heart. On the inside I used a glassine bag and put in some treats.

That's it for now. I hope you enjoyed this and see you next time!

Sunday, February 12, 2012

School Valentine Treat Bags

Boy, do I love Valentine's Day. The pretty colors are so enticing to me. That being said, as a mom, oh, my gosh, how much work it is. My daughter needs valentines for her class, her teacher and assistants, her after school daycare friends, my friends at work and my family. And of course, I can't just buy something, right?!
So these are the valentines for my daughter's first grade class. I really wanted to do something more elaborate, but, really, they are just going to tear into them to get the candy, so I had to hold back. Then as you can see, I had to let my daughter sign them. I could feel my control issues coming through, but you have to let them do it, cuz it is for her friends -- I just keep telling myself that.
Here is a closer look of her design work. That is my daughter's version of a heart. She is going to be a scrapper yet. Have a great night and thanks for stopping by.

The Shabby Tea Room Challenge #100


http://theshabbytearoom.blogspot.com/2012/02/week-100-candy-hearts.htmlShabby Tea Room #100 Challenge
This project is for the Shabby Tea Room. I just love this website, and Debbie Marcinkiewicz is one of my alltime favorites. I really enjoyed making these. I made a few of these to give to my daughter's teacher and some others at her school. I don't remember the name of the company I got the tins from, but if you email me or leave a comment, I will look it up and let you know. I used a punch for the edges of the paper which is a paper from the Crafty Secrets CD. It is one of the best purchases I have ever made. I took the rose bud ribbon from Sa Crafters and put sticky tape on the back and made a circle for the background and then used a scallop punch for the sentiment which is from Papertrey Ink.
The candy on the inside is Hershey nuggets with some prima flowers and the roses from the trim decorated on top. I topped it off with a bow. I just thought these looked so victorian.
Well, I hope they enjoy them, and I hope you have a wonderful day and a very Happy Valentines! Thanks for visiting!

Saturday, February 11, 2012

Shabby Chic Chest of Drawers

This project is something I have had ever since I went to Texas last year at the Great American Scrapbook Expo -- a fantastic place to go! The kit is called Chest of Drawers by Kaiser Craft.


I just love the way this product comes. The drawers are a very thick chipboard that I painted the insides, so when you open it, you see pink instead of the board color. I covered the sides and front of the drawers with paper from Stampin Up. I can't remember the names of the paper, but it their designer series from last year. I used some pearls and rhinestones to cover up the seams on the drawers -- thought that added a little something extra. I also painted all the other wood pieces with pink and glued the paper on the sides that were showing before I put it together.

The fabric flowers are from Melissa Frances (just love about everything she makes). The other flowers are from I Am Roses. She has the most reasonable prices for Prima looking roses. You just need to plan what you want, because it takes a while for shipping from Taiwan.

The strip of roses along the back of the sides are from Sa Crafters. She has some wonderful trims and flowers she sells. She also has some great flower tutorials on You Tube that are great to watch. I glittered the scroll chipboard pieces on the side.

I don't seem to have the photographing of my projects down yet. I am working on it. The color always seems a little off. Anyway, I hope you enjoyed this, and I will see you next time.

Tuesday, February 7, 2012

CR84FN Challenge 47

I am just getting back into the challenges again, and when I saw these colors, I couldn't resist. A friend of mine is having a baby, and she is decorating it with Dr. Seuss colors and themes. I made this for her baby shower. I didn't really think about it when I was taking the pictures, but I hadn't filled it yet and then forgot to get photos of it filled -- some day I will get it all together.
Sorry for the shadows, but I didn't have my light box. It is a baby carriage that I made with a MTME template. I filled it with a onesie and some booties with a gift card.

This is a view of the back. I downloaded some clipart from the internet with a Dr. Seuss logo on it. I used this on the back and for the wheels.

I hope you enjoyed this. Thanks for looking!

Desk Organizer

Hello, everyone! I took a little leave of absence from posting. I have had a few personal issues that took time away from crafting, but now I am back and ready to go. I have still been browsing the blogs and loving all the inspiration I get from everyone else.

I just got done entering a flower swap, and if you can believe it, I waited to the last minute to get them done, so I didn't get any pictures. I will try to make a video of the flowers I get back and take some photos and post them when I get them.
So without further delay, here is my first project I am posting for the year!


This is a desk organizer made from My Time Made Easy Keep It Template. I cut this out using my Silhouette machine. Love that machine! I used the PTI Raspberry Fizz cardstock and patterned paper. It has a drawer on the bottom. The center part holds index cards that you can put address cards in. I haven't put labels on it yet. The top section also holds index dividers that you can put cards in it and label it by month or occasion for all your greeting cards.

I used the monogram stamp from MTME for the G on the back. I made this for my friend at work using her initial.

I hope you enjoyed this, and have a wonderful day!

Thursday, June 30, 2011

Week 1 Online Summer Camp

I know I haven’t posted in a while.  I have been super busy at work.  In June I went to Texas to the Great American Scrapbook Convention.  It was absolutely fantastic.  I can’t wait until next year when I can go back.

Anyway,  the card I have today is an entry that I have for the Kristina Werner and Jennifer McGuire Summer Camp that I did using the colors for week 1.  This was a challenge for me because I had a hard time picturing this color combo, but I really enjoyed stepping outside the box.

I hope you enjoyed this.  See you next time!

2011-06-30_16-21-23_708

Wednesday, May 4, 2011

Whimsical Key Card

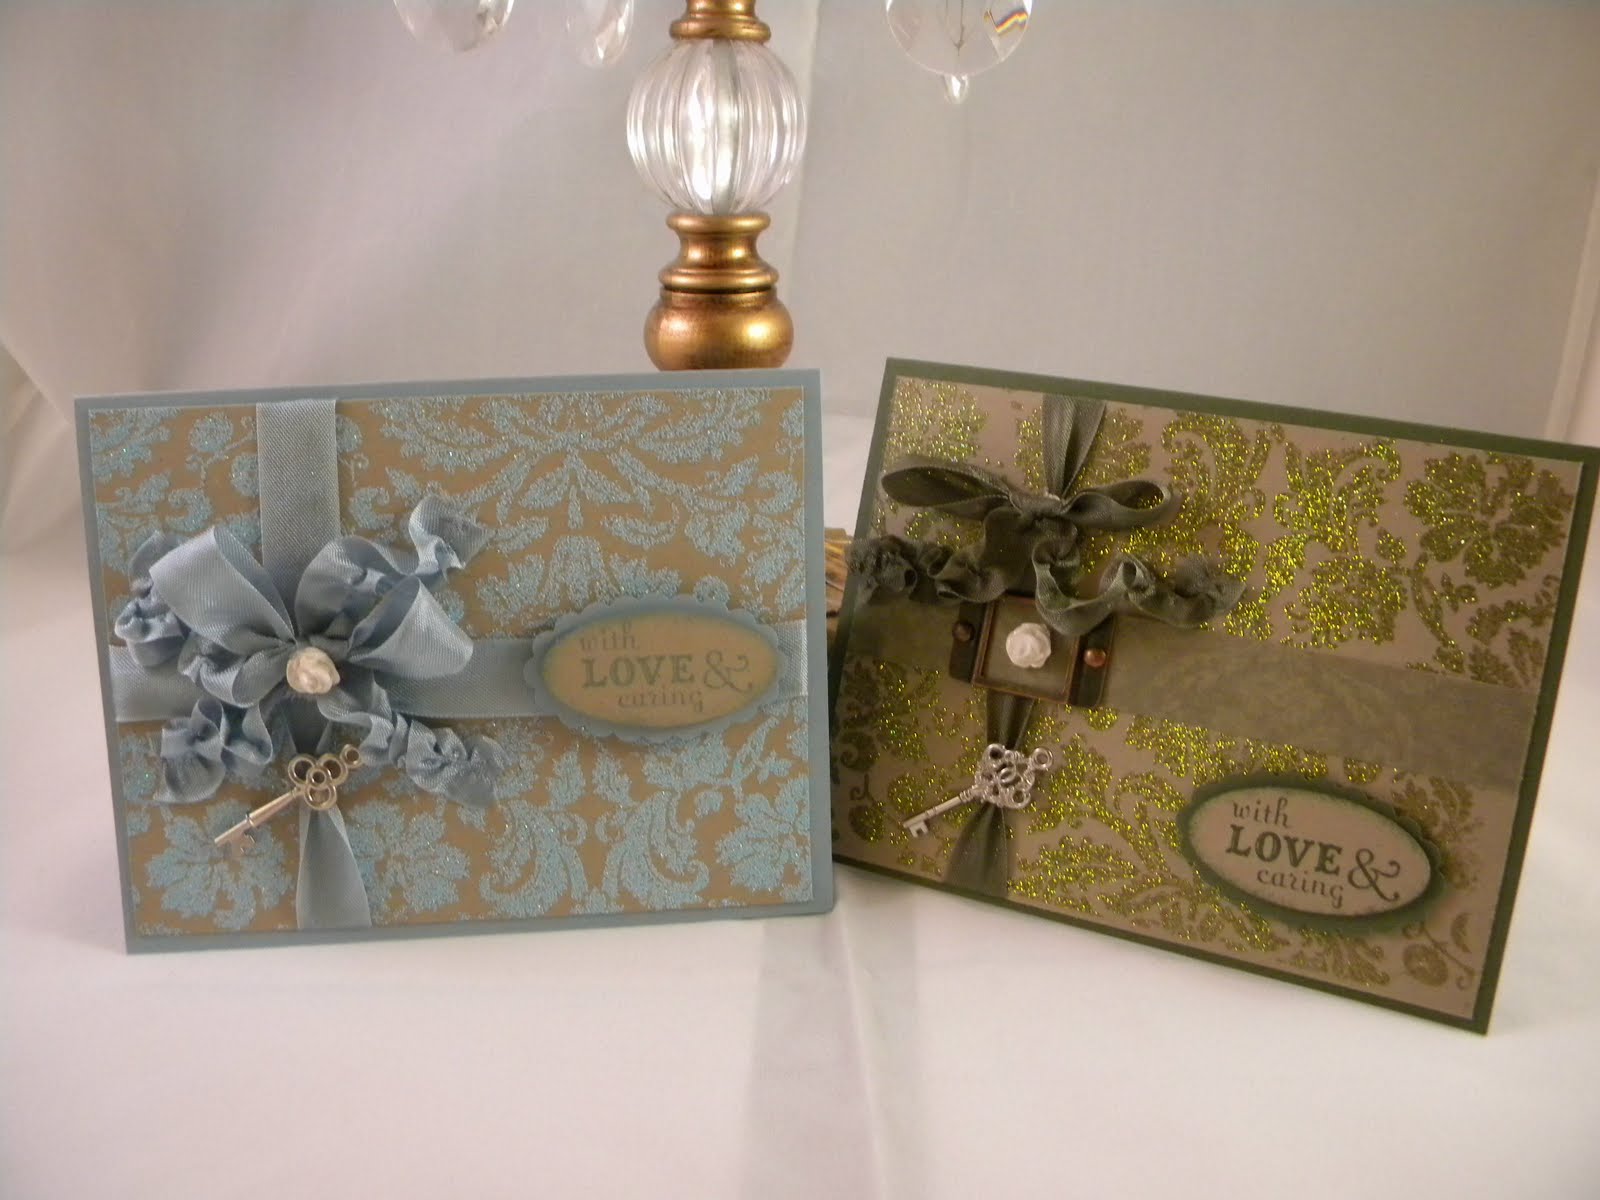
Hi everyone! Today I have a card that I really loved making. It was very whimsical and elegant, I thought. I started out making one in green and thought it would look cute in the blue, so I did that one a little different.


On the blue card I used the Baja Breeze card stock from Stampin Up and embossed my images on Crumb Cake card stock from Stampin Up. The ribbon was made out of Baja Breeze bias tape with the key from Stampin Up and the rose I made from the Mold Muse that I baked with Sculpey clay.


The green card I used the Always Artichoke card stock from Stampin Up and embossed on the Crumb Cake card stock, also from Stampin Up. Key is from Stampin Up and Always Artichoke bias tape for the ribbon. The frame I am not sure where I got and then the rose, same as the blue one.


Tuesday, May 3, 2011

Pinwheel Card


Hi everyone! I just saw this pinwheel technique and had to give it a try. I was doing my usual search through You Tube and saw this video from Dawn at Dawn's Stamping Thoughts. She is so talented. I have used many of her designs and been super pleased with the results.
I made a couple different colors and thought they looked so whimsical. I used my new light box to photograph these and I thought they turned out great! I made a video on how to make these cards and am in the process of editing them. I will post them as soon as I can.
Thanks for stopping by!
 
Images by Freepik